
The Corner Bathroom: How to Design a Space That Works

Struggling with a corner bathroom layout? Get expert advice on fixtures, plumbing and storage to design a space that truly works.

How to Measure and Plan Your Corner Bathroom Layout
To design a functional bathroom, you need to measure and lay out a scaled version of the bathroom first. A corner bathroom can be tricky to lay out, and the limitations can catch you out if they are not measured and noted on the plan.
First up, I measure the bathroom length and width at floor level, then sketch a scaled layout plan. Doors, windows, and plumbing rough-ins all get marked on the plan. Whether each door swings in or out matters more than you'd think — I always note it.
New to this? Sketch a basic floor plan first and get every measurement written down. There are plenty of free planning apps online worth a look. Graph paper at 1:20 scale is my go-to — there's no fudging the numbers that way. Buying fixtures before you've confirmed the rough-in dimensions — that's the mistake I see most often. Pin down the plumbing wall first; the rest of the layout tends to sort itself out from there.
A dimensioned floor plan lets you choose fixtures that suit the room — not the other way around, where you've already bought something and hope it squeezes in.
Choosing the Right Fixtures for a Corner Bathroom
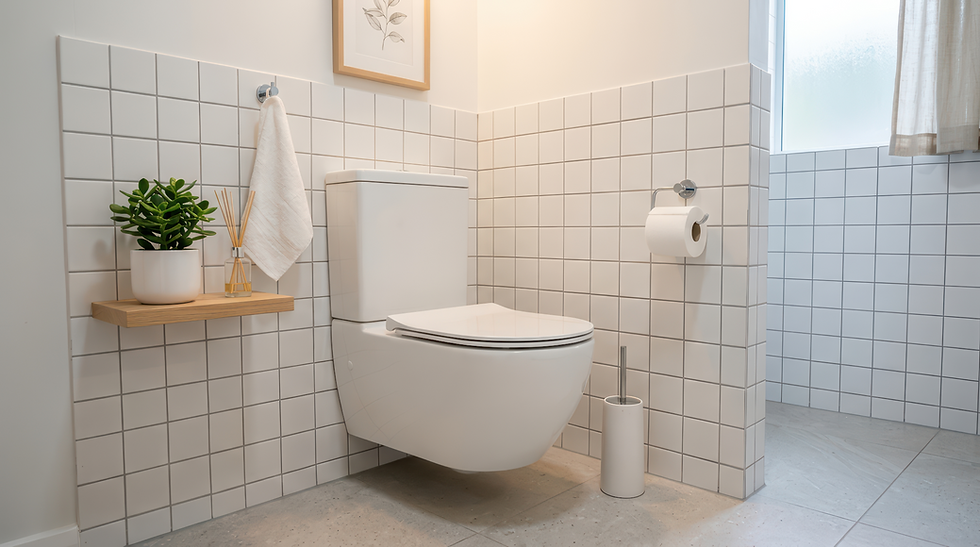
Most homeowners underestimate how much fixture depth and projection can eat into usable floor area. Compared with a close-coupled floor-mounted suite, a wall-hung toilet typically pulls back 100 to 150 mm of floor projection — and in a tight corner bathroom.
Short basin mixers tend to suit corner bathrooms well — though wall-mounted mixers are worth considering where bench space is tight. Of all the fixture decisions in a corner bathroom, the vanity is usually the one that takes the longest to nail down. It's a tricky buy — cabinetry material, basin configuration, and plumbing rough-in requirements all converge in the one unit.

Corner Vanity Units: Materials, Sizing and Installation
So what is a corner vanity unit? It is a cabinet fitted diagonally across a corner to utilise that space more efficiently. Purpose-built corner vanity units in diagonal widths range from 450 mm to 900 mm. It is essential to confirm that the cabinet carcass and basin cut-out suit the plumbing rough-in.
Cabinetry material matters because bathrooms are a humid environment. PVC board is fully waterproof and performs best in high-humidity conditions. Moisture-resistant MDF is the next option, though it is not fully waterproof. Timber and plywood cabinet carcasses must be properly sealed and the room well ventilated.
If a wall-mounted corner vanity unit is being considered, it must be fixed securely to studs. In a corner bathroom layout, stud placement is often not ideal — engage a qualified carpenter or builder to check the wall framing before proceeding, particularly where a stone benchtop adds significant weight. Note also that the vanity cabinet is typically supplied without a basin mixer or basin waste. Purchase a basin mixer and a 32 mm basin waste separately and budget for these items accordingly.
With the corner vanity unit resolved, the next consideration is what will occupy the remaining corner space — specifically, whether a corner bathtub, a shower, or both will fit.

Corner Bathtubs and Showers: Sizing, Costs, and Fit
A corner bathtub is installed into a corner footprint ranging from 1200 × 1200 mm to 1500 × 1500 mm. Some bathtubs are constructed from acrylic with a fibreglass backing — lightweight, warm to the touch, and straightforward to install. Corner spa baths with jet pumps are also available, Their installations require both a licensed plumber and a licensed electrician to connect the pump circuits. Cast iron corner bathtubs are available but require verified structural floor capacity before installation.
A corner shower enclosure requires a minimum footprint of 900 × 900 mm; 1200 × 1200 mm is the recommended minimum where the floor plan allows. Grade A safety glass is required — either toughened or laminated — at a minimum thickness of 6 mm for frameless and partly framed screens.
Shower wall waterproofing has to reach at least 1800 mm above the finished floor substrate. Walls sitting alongside a corner bathtub need water-resistant treatment up to at least 150 mm above the vessel rim. A licensed waterproofer must sign off on all waterproofing before a single tile goes down or any sanitary ware is fitted. Between each membrane coat — and before tiling starts — you need to allow 24 to 48 hours of cure time. Seriously, don't rush this stage — particularly in a corner bathroom.


Comments