How to Turn Your Cherished Memories into Custom Wall Art
- Amelia Roberts

- 1 day ago
- 4 min read
Learn how to turn your cherished memories into custom wall art with creative design ideas that personalize your space and preserve special moments.
Ever look around your living room and feel like your walls are missing a bit of life? Standard store-bought prints are fine, but they don’t exactly have a soul. Instead of hanging another mass-produced frame that thousands of others already own, the real solution is to bring your own stories into the spotlight.
So, how exactly do we bring those personal stories into our rooms? We all have phones packed with photos: vacation snapshots, funny faces our pets make, and random family moments. But unfortunately most of those great shots end up forgotten somewhere in cloud storage or lost in our camera rolls.
If you want to rescue those moments from your screen, a custom paint-by-numbers, designed specifically for adults, is a pretty fun and easy way to do it. It gives you a great excuse to put down your phone for a while, and you get to hang something on your wall that literally nobody else has.
Why Choose Custom Paint by Numbers?
If you're not familiar with paint by numbers, it's a canvas where your photo is turned into a numbered outline, and you simply fill in each section with the matching numbered paint.
Beyond being a simple and creative project, it is also a great way to improve your well-being and elevate your home decor. Here is why taking up the brush is so rewarding:
Great Way to Unwind: Painting is one of those hobbies where you actually forget about your phone. Spending a few quiet hours with a paintbrush is the ultimate digital detox. When the world is moving way too fast, sitting down to paint forces you to slow down, focus on the present, and create something beautiful from scratch. It’s basically a cozy form of meditation that happens to leave you with a stunning piece of wall art at the end.
No Artistic Skills Needed: The canvas comes with all the lines and numbers already printed on it, and every number matches a specific paint pot. All you have to do is stay inside the lines. No need to stress about drawing or picking matching colors.
A Real Conversation Starter: Hanging an artwork you actually painted yourself is a total flex compared to buying a mass-produced print. When friends ask about it, you get to tell them the story behind the photo and how you spent a few evenings bringing it to life.
How to Pick the Best Photo
The secret to a great custom painting comes down to the photo you choose. While almost any image can be turned into a template, certain things just look way better on canvas.
1. Good Lighting and Clear Contrast
Pick a photo with distinct shadows, highlights, and clear contrasts. Images with bold, separate colors translate really well into a painting. If a photo is mostly gray or the subject blends into a dark, blurry background, the final painting can look a bit muddy.
2. One Clear Subject
Close-ups of people, pets, or a specific landmark work best. If there is too much going on in the background—like a huge group photo taken from far away—the numbered spaces will turn into microscopic dots that are incredibly frustrating to paint.
3. Keep It Sharp
The sharper and clearer the original photo, the better the final template will be. If a photo is blurry, it’s hard for the design software to tell where one shadow ends and another color begins.
Creating Your Workspace
Making your masterpiece shouldn’t feel like a project on your to-do list; it should be an experience. To really get into the creative groove, you’ve got to set the right vibe.
Find a comfortable, well-lit table where you can leave your setup out if you want to paint in short, relaxing sessions over a few days. Put on a playlist that matches your mood—whether that’s smooth jazz, acoustic lo-fi, or that podcast you’ve been meaning to catch up on.
Finally, treat yourself. Pour a crisp glass of wine, or fix yourself a rich latte. Painting is a form of self-care, so treat your session like a luxurious, relaxing afternoon just for you.
Simple Tips for a Better Finish
When you first unroll your custom kit, seeing all those tiny lines and numbers can feel a little intimidating. Don't worry. The whole process is pretty foolproof, but a few quick tricks will make your finished canvas look way cleaner.
1. Work Top-to-Bottom and Color-by-Color
To keep from accidentally smudging wet paint with your hand or sleeve, start at the top of the canvas and work your way down. It’s also much easier to paint all the spots for one number before moving on to the next pot. This also keeps your paints from drying out.
2. Cover the Numbers Properly
Lighter colors (like whites and yellows) might need a second coat of paint so the printed number underneath doesn't show through. If you want to get a little fancy, you can softly blur the edges where two colors meet using a finger or a dry brush while the paint is still wet—it makes the final piece look less like a puzzle and more like a painting.
3. Frame and Hang It
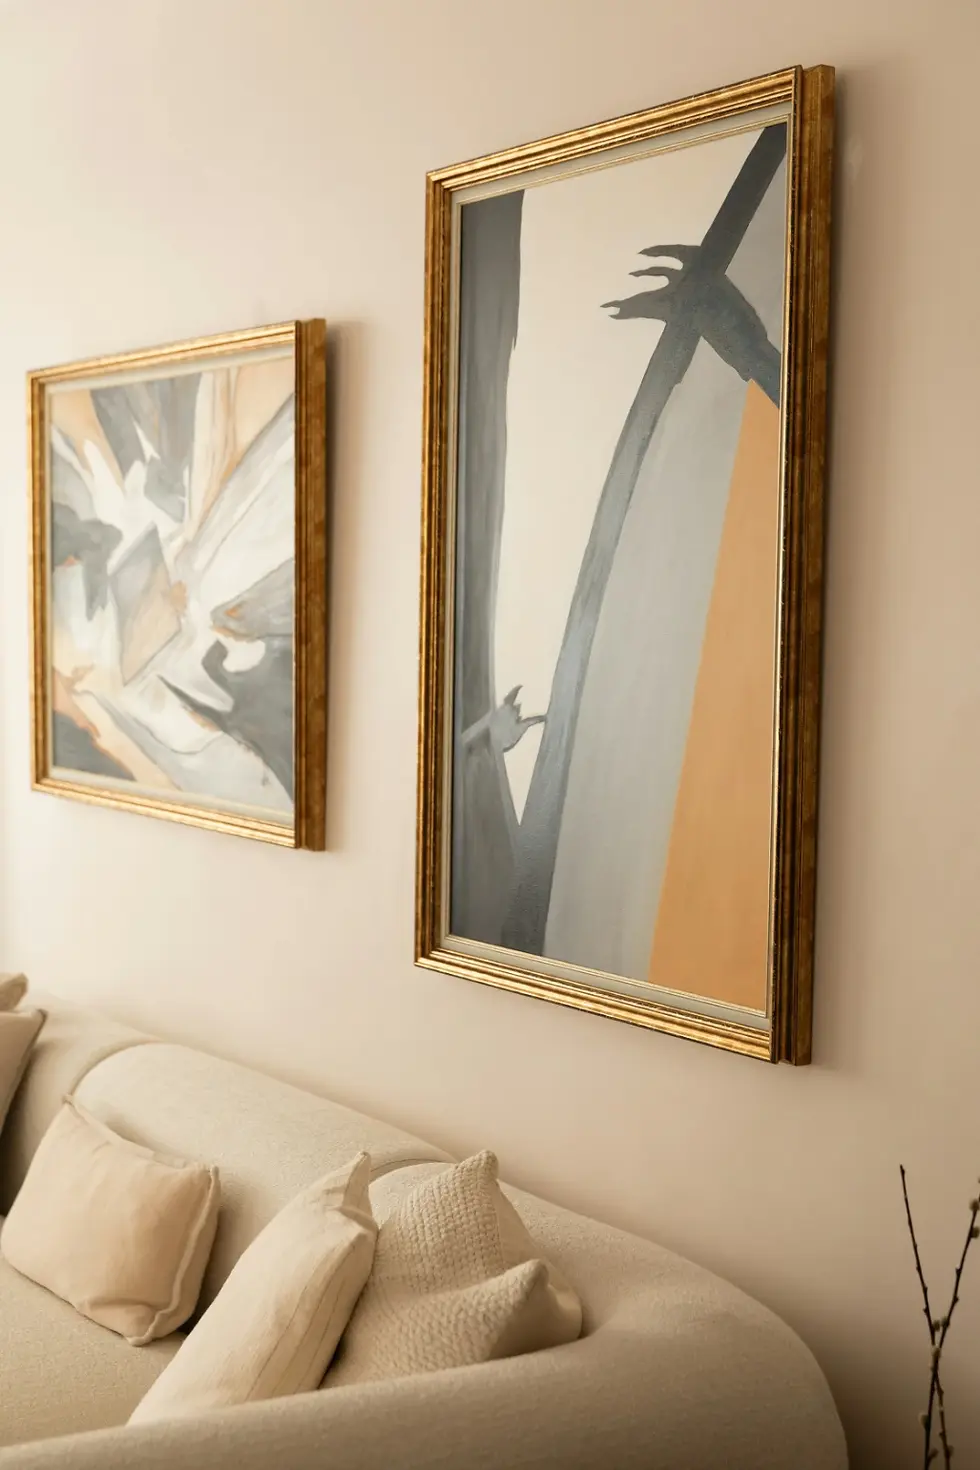
Once the paint is completely dry, your memory is ready for the wall. You can stretch the canvas over a wooden frame or pop it into a regular frame that matches your room—whether your style leans toward dark greens, petrol blues, or just simple natural wood.
If your painting turned out super vibrant and bold, let it be the star of the room by hanging it on a more neutral wall. To make the space feel professionally styled, pull a few subtle accent colors from your canvas and mirror them in your decor—like through a cozy throw blanket, some textured cushions, or a ceramic vase nearby.
Conclusion
Custom paint-by-numbers is a rewarding way to bring your favorite moments into the real world. It takes a little time and a bit of patience, but that’s exactly what makes it a great project.
The next time you’re scrolling through your phone, see if there's a photo that deserves to be a real piece of art on your wall instead of just another double-tap.


Comments