
How to Turn a Shipping Container Into the Dream DIY Workshop

Updated: Jul 31
Turn a shipping container into a dream DIY workshop with smart layout ideas, insulation tips, and practical upgrades for a functional, comfortable workspace.
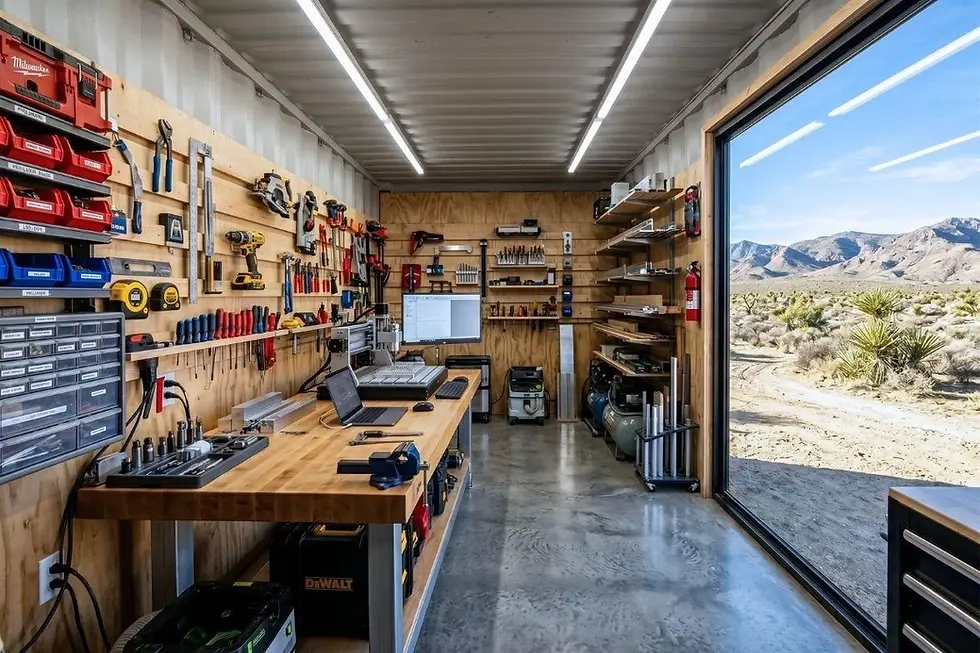
A dream workshop does not have to start with a big garage or a custom building. For many DIYers, the perfect workspace can begin with something much simpler: a shipping container. It offers strong steel walls, a compact footprint, and a clean structure that can be turned into a practical place to build, repair, paint, weld, or create.
What makes a shipping container such a smart starting point is its flexibility. It can sit in a backyard, beside a barn, on a job site, or on a piece of rural land. It gives you a dedicated workspace that feels separate from the house, which is a big advantage when your projects involve noise, dust, or tools that need a permanent home.
Turning a container into a great workshop takes more than moving in a workbench and a few shelves. The best results come from thoughtful planning. You need to think about layout, power, lighting, airflow, security, and comfort. Once those pieces come together, a basic steel box can become one of the most useful spaces on your property.
Start With the Right Container
The first step is choosing the right container size and condition. A 20-foot container is often enough for many hobbyists and home DIY users. It gives you room for a bench, tools, storage, and a central work area without taking up too much yard space. A 40-foot unit works well for larger setups, especially if you want separate zones for cutting, assembly, and storage.
Condition matters just as much as size. When comparing new and used shipping containers, consider your budget, the intended workshop setup, and how much cosmetic or structural work you are prepared to complete. If your budget allows, a newer one-trip container usually gives you the cleanest starting point. It tends to have less rust, fewer dents, and a better overall appearance. A used unit can still work very well, but inspect it carefully for damage, leaks, floor issues, and signs of corrosion.
Before delivery, think about placement. Your workshop should be easy to access year round. You will want enough space to open the doors fully, move materials in and out, and park nearby when unloading tools or lumber. A level foundation is also important. Many people use gravel pads, concrete piers, or a concrete slab to support the container and keep it stable.
Plan the Workshop Around the Work You Actually Do
One of the biggest mistakes people make is building a workshop that looks good but does not match their habits. Before making upgrades, picture how you will use the space each week. A woodworking setup needs different features than a welding shop, motorcycle workspace, or craft studio.
Start by listing your main tasks. Then break the interior into work zones. You may want one side for a main bench, one end for material storage, and a wall dedicated to hanging hand tools. If you use larger equipment, plan for enough clearance to move around safely.
This is also the stage to decide if your project needs windows, extra doors, or special access. Thinking through shipping container door options early can save money and frustration later. Some people are happy using the original cargo doors, while others benefit from adding a man door, roll-up door, or side access entry to make daily use easier.
Make It Comfortable Enough to Use All Year
A steel container can get hot in summer and cold in winter, so comfort should be part of the design from the beginning. If the space is uncomfortable, you will use it less often. Insulation makes one of the biggest differences.
There are a few ways to insulate a container, including spray foam, rigid foam board, and framed wall systems with batt insulation. The best choice depends on your budget, climate, and how finished you want the interior to look. In many workshop builds, people frame the inside walls with wood or metal studs so they can add insulation and cover it with plywood or other wall material.
Ventilation matters too. Workshops create heat, dust, fumes, and moisture. A basic setup may include passive vents and a fan, while more advanced builds might use exhaust fans, intake vents, or even a small mini split system.
If you plan to paint, grind metal, or do any work that creates strong fumes, airflow becomes a safety issue as much as a comfort feature.
Bring in Enough Power and Light
A workshop is only as useful as its power setup. Extension cords from the house might work for a short time, but a real workshop needs a safer and more reliable solution. If possible, have a licensed electrician help plan the electrical system.
Think about what tools you use now and what you may add later. Table saws, welders, air compressors, dust collectors, battery chargers, and heaters all place different demands on the system. Add more outlets than you think you need, and spread them around the container so you are not relying on power strips everywhere.
Lighting is just as important. A container without good lighting feels cramped and dull, even if it is organized. Bright overhead LED fixtures work well because they are energy efficient and provide clear visibility. Task lighting above a workbench makes detail work much easier. Windows can also improve the feel of the space, but even without them, strong artificial lighting can make a huge difference.
A good workshop should feel bright, safe, and ready for use at any hour. When power and lighting are handled well, the whole space becomes more professional and easier to work in.
Build Smart Storage Into Every Wall
In a shipping container workshop, every inch matters. The best way to avoid clutter is to treat the walls as working surfaces, not just boundaries. Vertical storage is your friend.
Pegboards, tool racks, magnetic strips, shelving, and cabinets can all help keep equipment off the floor. Open shelving makes items easy to grab, while labeled bins help control small parts. Heavy items should stay lower for safety and stability.
A fold-down bench can save space in narrow builds. Overhead shelves near the ends of the container are useful for seasonal tools or less-used supplies. Some people even create rolling carts that slide under benches when not in use.
The goal is to keep the center floor area open enough for movement and larger projects. A cramped workshop quickly becomes frustrating. An organized shipping container workshop feels larger than it is because the layout supports the work instead of getting in the way.
Focus on Security and Long-Term Durability
One major benefit of a container workshop is security. Steel walls and lockable cargo doors already offer a strong starting point. Still, a few extra steps can protect your investment.
Use quality locks and lock covers designed for container use. Motion lights outside the unit can discourage theft. If the workshop contains expensive tools, a camera or alarm system may add peace of mind. Inside, protect your tools from moisture by sealing gaps and managing condensation through ventilation and insulation.
It is also smart to think long term. Use finishes and materials that can handle workshop wear. Plywood wall coverings are popular because they are tough and easy to mount tools on. Durable flooring or sealed subfloors can make cleanup easier. Paint or coat any cut steel edges after modifications to reduce the risk of rust.
Add the Personal Touches That Make It Yours
Once the core function is in place, the final step is making the space feel inspiring. This is where your container stops being a storage box with tools and starts becoming your workshop.
Paint the interior in light colors to brighten the room. Hang a clock, a whiteboard, or project plans on the wall. Add a stool, a speaker, or a small coffee station. If space allows, create one clean corner for sketching ideas or repairing smaller items.
Personal touches matter because they shape how the space feels when you walk in. A workshop should invite you to start something. It should make you want to spend an afternoon building a cabinet, fixing an engine, or finally finishing that project you have put off for months.
A Practical Space With Real Creative Potential
A shipping container may seem like a simple steel shell at first, but with the right planning, it can become a workshop that is efficient, secure, and genuinely enjoyable to use. It gives DIYers a chance to create a dedicated work zone without building a full structure from scratch.
The best container workshops are not always the biggest or the most expensive. They are the ones designed around real needs, good workflow, reliable power, solid storage, and year-round comfort. When those pieces come together, the result is a workspace that supports your skills and grows with your projects.


Comments